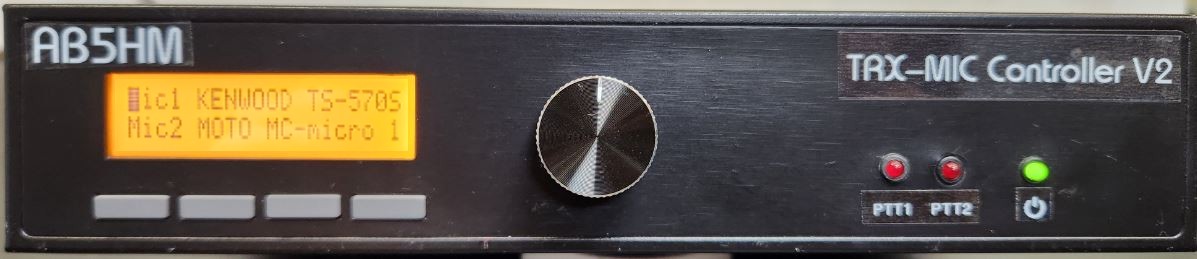
TRX-MIC Controller V2
At one point i got annoyed by all those separate microphones hanging down from the different transceivers in my shack.
I reality, you can only talk into one microphone at the time... so why not using one microphone for all of the transceivers?
The main problem was that the different transceivers require different signal levels and some might even need
a balanced signal input (mic signal not related to ground).
So this is my solution...
This TRX-MIC controller includes two low noise microphone pre-amplifiers with individual gain setting ( 50...60dB gain)
and PTT. It provides 8 TRX outputs with galvanically isolated mic signal and PTT output.
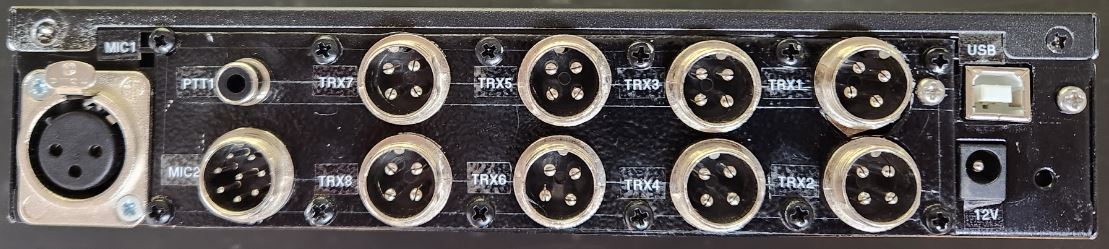
Each of the 8 output channels have an individual gain setting and a name up to 16 characters can be assigned.
It also includes and UP and DOWN button input that can be used to select the active transceiver as well as an
USB-to-serial input for a serial command line interface (CLI) that is used to enter the names of the transceivers.
MIC pre amplifier:
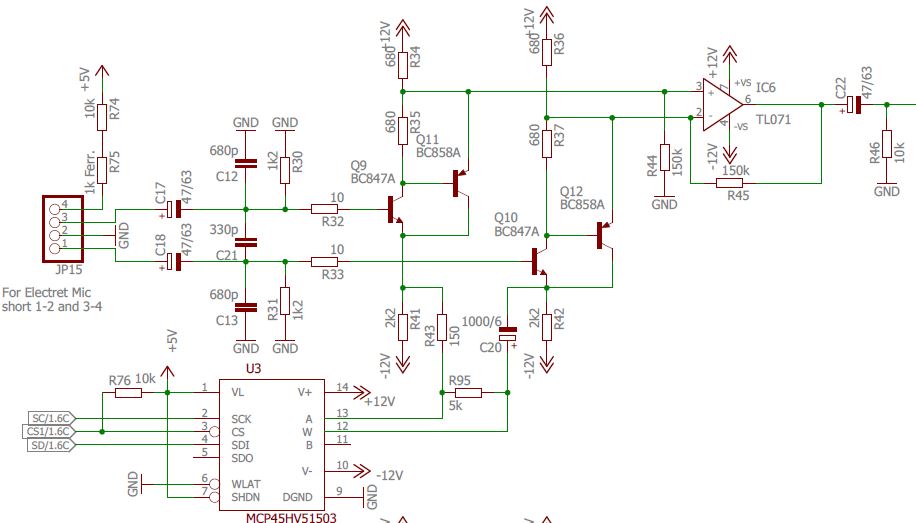
This design is similar to professional audio amplifiers. It provides very low noise, low distortion and a great
common mode rejection ratio (hum rejection).
The amplifier consists of two compound pair of transistors (BC847 and BC857) to form a differential input
and output amplifier with variable gain using a single digital potentiometer (U3) that allows to adjust the
gain to be adjusted by 20dB.
The balanced differential output is then converted to unbalanced using a differential op-amp stage (IC6).
The total gain can be adjusted with R44 and R45.
Output attenuation:
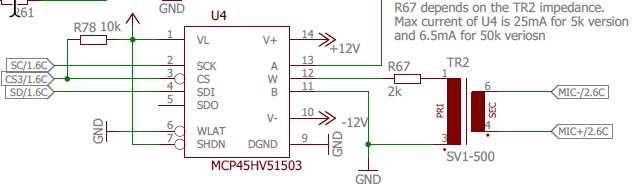
Output signal attenuation is also realized with an digital potentiometer (U4).
The output is not buffered. Therefore the total gain depends on the transceiver impedance. The sown configuration provides 50dB total gain at 100 Ohm and around 60dB at 5k impedance.
Transformer T2 transforms the unbalanced signal (referenced to ground) back to an balanced output signal. This allows the signal to be used in both ways.
Signal output and PTT:
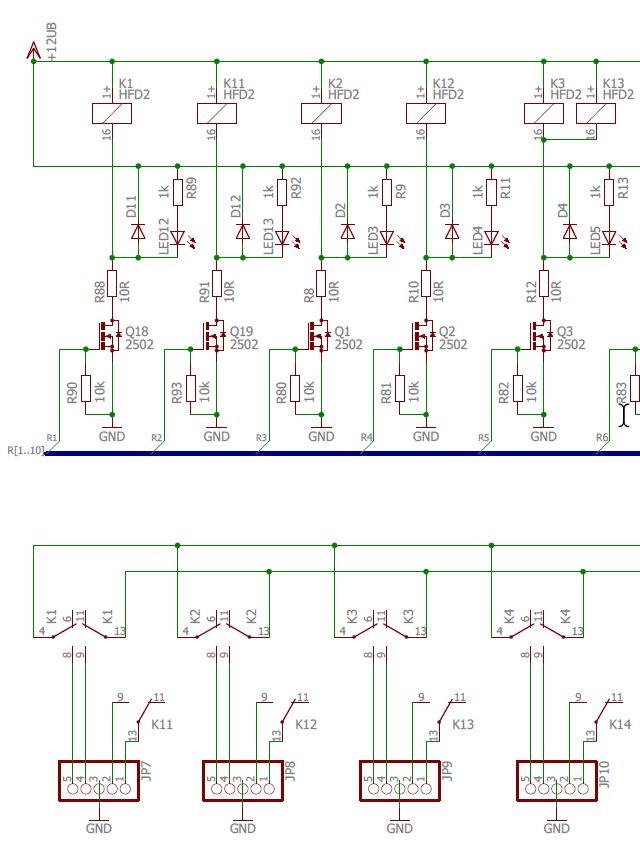
Each signal output uses two DPDT relays to provide galvanic insulation towards ground and the other
transceivers. One relay is used for the balanced MIC signal and the second relay for the transceiver PTT. If an unbalanced output is needed, on mic output will be connected to ground in the transceiver MIC connector.
Transceiver output TRX 1 and TRX2 have individually controllable MIC and PTT relays to be able to provide VOX functionality where only the MIC relay closes and the PTT relay is not activated.
Controller:
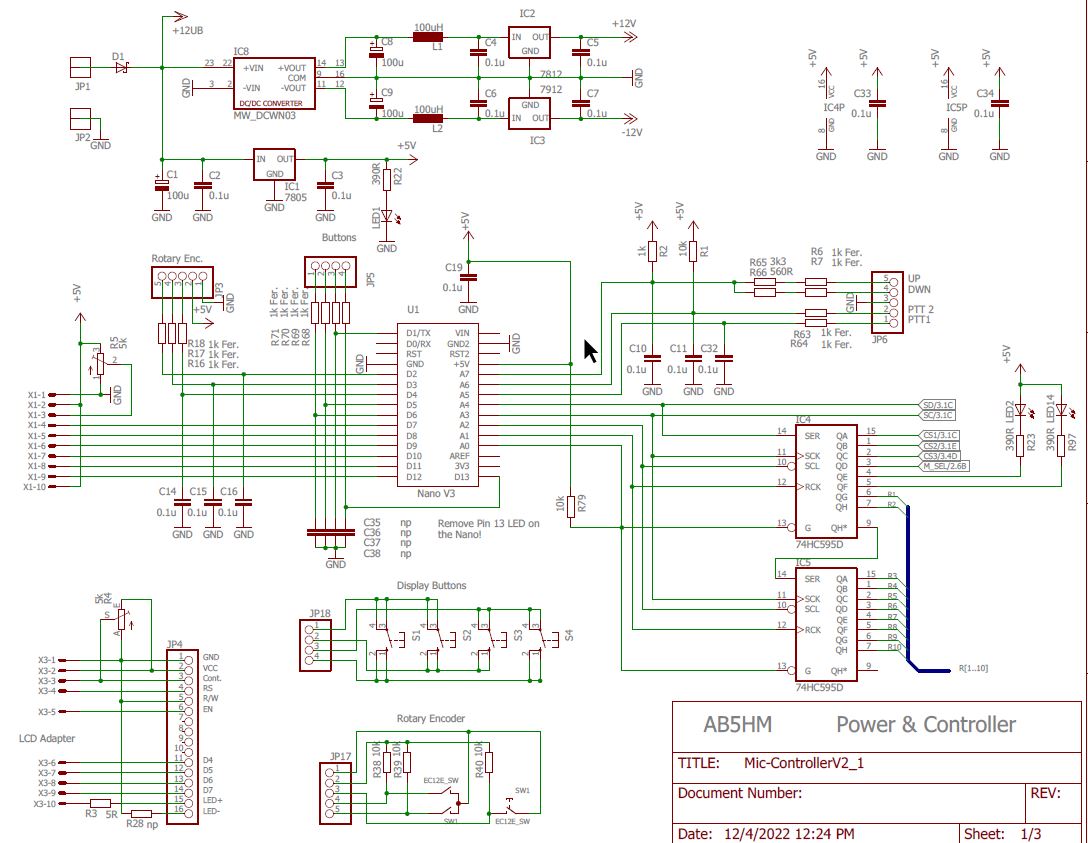
The controller is an Ardunio Nano with a 2 x 20 character LCD display, rotary encoder and 4 buttons.
Operation:
The active TRX can be individually selected individually for each microphone with the rotary encoder or the UP and DOWN buttons.
When the one of the two PTT inputs is activated, the MIC attenuation for the selected transceiver is set with U4 and the corrosponding output relays are closed.
Setup Menu:
To enter the setup menu, push any of the 4 buttons under the LCD display and then push the button for SETUP.
| Menu item | Function |
| MIC 1 Gain | Set the gain for microphone input #1 |
| MIC 2 Gain | Set the gain for microphone input #2 |
| TRX Gain | Set the individual gain/attenuation for the individual transceivers |
| TRX Names | Activate the serial command line interface (CLI) to enter the individual TRX names |
| UP/DWN assignment | Auto: UP / Down buttons are assigned to the mic that has transmitted last MIC1: UP / Down buttons are assigned to the mic #1 MIC2: UP / Down buttons are assigned to the mic #2 |
| Exit | Exit and return to main display |
Command Line Interface (CLI):
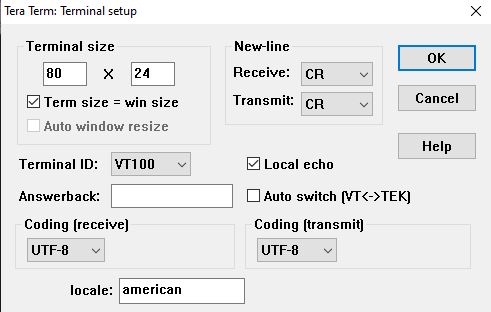
The CLI uses a serial connection with a terminal program (e.g. Tera Term) to set the individual transceiver names.
- Connect the controller via USB to your computer.
- Start Tera Term and select the USB serial port
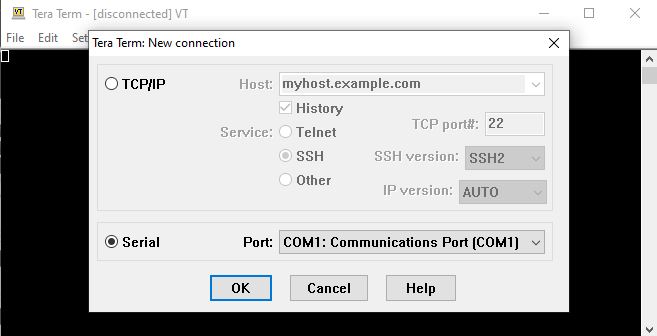
- Go to SETUP and select Serial port... and make sure it is set to 9600 Baud.
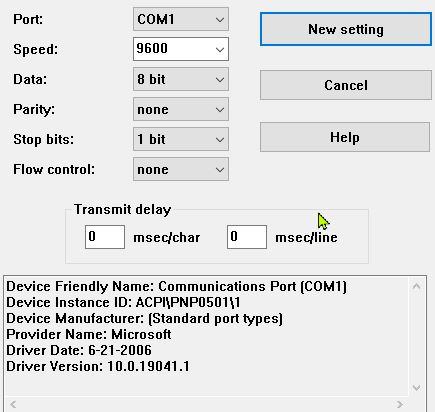
- Go to SETUP -> Terminal Setup... and activate local Echo
- Activate the CLI on the TRX-MIC controller: SETUP -> TRX Names
Note: the buttons on the controller are locked while the CLI is active!

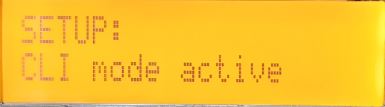
- CLI is ready:
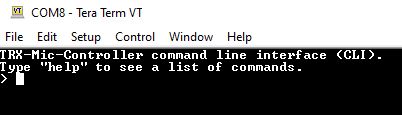
To enter a new TRR name use the following command:
trx,TRX number [1..8],TRX name [max 16 characters]
then press Enter:
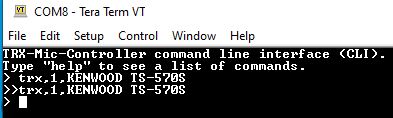
- When finished, type exit and press Enter to terminate the CLI session
MIC Signal Setup: